
Street photography tips for beginners: where do you start?
Someone walks through beautiful light, but you're still adjusting your settings. How do you keep photography simple enough to notice what's happening in front of you?
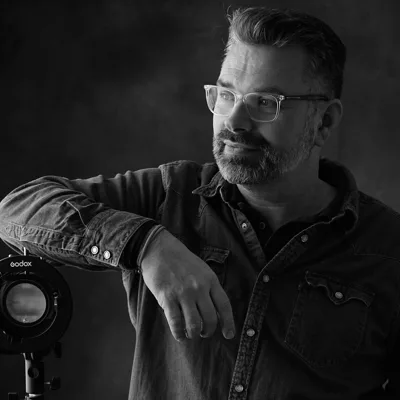
Michiel Heijmans, one of the editors
Updated on October 13, 2026
Start with less gear
You want to head out but aren't sure which lenses to bring. For close-ups, for distant subjects, just in case. Before you know it, you've packed something for every possible photo without even stepping outside.
For your next walk, try bringing only what you actually intend to use. One camera with one prime lens keeps your choices manageable. You can then focus on where to stand and what to include in the photo.
Street photography is about everyday life in public spaces. You don't need to find a special event before you can start. Look at what's already happening somewhere you go anyway.
Choose one small thing to pay attention to before you go. How people relate to their surroundings, for example. That gives you a starting point without having to plan the photo in advance. The rest of your gear can come along another time.
Michiel's fifteen street photography tips are almost never about settings.
Choose settings you can work with
Figuring out your settings again for every passerby is a lot of work. Choose an approach in advance and check at the start whether it suits the situation. That leaves you room to look around while you're photographing.
When I'm walking, I set my shutter speed myself, using 1/500 second for people who are walking. When I'm standing still, I use aperture priority at f/4.5. I use Auto ISO with a maximum I set myself, along with autofocus. My favorite prime focal lengths are 40mm and 35mm.
That's a useful starting point to try. Then check your own photos. Did you capture the movement the way you intended? Is the focus where you wanted it? Make a specific adjustment if the answer is no.
The guide to setting up your camera for street photography covers shutter speed, aperture, Auto ISO, and focusing in more detail. Refer to the part you're still unsure about.
Zone focusing is an alternative to autofocus: you focus at a set distance in advance. You don't need to practice both approaches on the same walk. Choose one and see how it works for you first.
Give a place some time
You can keep walking until something catches your eye. You can also stay somewhere because you think there might be a photo to make. Try the second approach if you finish a walk feeling like you've mostly just seen a lot of streets.
Choose a spot for a specific reason. The arrangement of light and dark, for example, or a background that makes you curious. Then watch what changes when someone walks through it. Does that person fit the photo you had in mind? Or is something more interesting happening elsewhere?
Stay long enough to try different possibilities. Look at the spot from another angle and compare what ends up in your photo, both nearby and farther away. You don't have to stay on the exact same paving stone.
If you're mainly unsure about how to get started outside, the guide to your first hour on the street helps turn that into a manageable exercise. Comparing all sorts of techniques can wait until later.
The article on finding the courage to photograph on the street looks at what makes it difficult to start photographing and how to work through that step by step.
Look at the light before you take the photo
Try noticing the light before choosing a subject. Where is it bright, where is it dark, and which part catches your eye first? Use that as the starting point for a photo.
You could choose a composition and wait for something to happen within it. Then watch how someone moves through the light. Take photos at different moments and look back later to see which position reads most clearly.
The background is part of that choice. Check what's behind your subject and what's entering the photo along the edges. Try a different position if something there keeps drawing your attention. Sometimes you may want to include it. Make both versions if you're unsure.
If you want to explore the balance of light and shadow further, you can practice using the guide to photographing in hard light. Choose one thing from it to focus on during your next walk. That's more manageable than trying to pay attention to everything in every photo.
Don't stop after one photo of a scene
You see something, take a photo, and move on. Try watching a little longer after taking the photo. The situation might still change, or a second attempt might help you see what you actually wanted to photograph.
Take more photos of the same scene, with a reason for each new attempt. Wait until someone is in a different position, for example. Then try another angle. This gives you different versions to compare side by side afterward.
Try not to change everything at once. If you change your position, framing, and settings, it becomes hard to tell which choice made the difference. Keep some things the same and explore one change.
That doesn't mean you have to keep going endlessly. Stay as long as there's something you still want to try. Sometimes your first attempt produces the photo you choose, sometimes a later one does. You don't need to make a final decision while you're out. You can take your time comparing them at home.
Work through your questions about photographing people, too
Street photography can involve photographing people you don't know. That can raise questions: what's allowed, how do you interact with someone, and where do you draw your own boundaries?
Take those questions seriously without trying to answer them all while you're photographing. Afterward, write down what you were unsure about. Was it taking the photo, using it, or a reaction you received? The more specific your question, the easier it is to find relevant information.
The guide to respect on the street helps you think about how you interact with people. Legal questions and your own judgment each deserve attention.
You don't have to base your judgment on what another street photographer does, either. Think about which choices you want to be able to explain yourself. That may raise different questions in different situations. Leave room for those, even if you already know exactly how you would make the photo technically.
Selecting photos is part of practicing
At home, you have time to look at what's actually in your photos. Start with a small selection. Choose the photos you want to look at again and try to put what you see in them into words.
Then compare different versions of the same scene side by side. Where does your eye go first? Which position makes the subject clear? Is there anything in the background that you didn't notice while you were out?
Look for differences between what you intended and the photo, too. Your memory of the moment has its place, but consider whether someone without that memory can see what caught your attention. Maybe it's too small in the photo. Maybe something else draws much more attention.
Keep your final selection small. If you're unsure, you can keep two versions to compare again later. You don't have to finish your selection in one evening.
If you notice something recurring in several photos, try putting them together. The guide to creating photo series helps you explore how photos can work together. You can keep that in mind on your next walk.
Make practice fit into your week
You don't need to set aside an entire afternoon for every walk. Try going out for a short time and giving yourself one thing to explore. Spending twenty minutes looking at the backgrounds in your photos is a concrete exercise.
Use your selection from last time to decide what to do. Did your subject keep blending into something behind it? Keep working on where you stand. Did you take only one photo of each scene? Try staying a little longer this time and making different versions.
If you'd rather start with a set assignment, you can choose one of the street photography assignments. Stick with that assignment for a few walks if you still see possibilities in it. You don't need to come up with something new every time.
Afterward, look through a small selection again. Write down what you want to repeat or change. That gives you a plan for next time, even if your schedule only allows for a short walk.
Questions about Street photography tips for beginners: where do you start?
What settings can I try as a beginner?
Michiel's approach offers a starting point: choose your shutter speed yourself while walking, using 1/500 second for people who are walking, and use aperture priority at f/4.5 when standing still. He uses autofocus and Auto ISO with a maximum he sets himself. Check at the start whether those choices suit the photo you want to make.
How much gear should I bring?
Try a walk with one camera and one prime lens. That lets you focus on where you stand and how you frame the photo, without having to choose between lenses along the way.
How do I choose what to practice first?
Look at a few photos you've already taken and choose one thing you want to explore. Work on that during your next walk, then compare your different attempts.
5 essential street photography tips
Sign up for Michiel’s newsletter and get his free e-book with practical tips and favorite street photos. First, confirm your email address using the link in the email.
About Michiel Heijmans
Portret- en straatfotograaf. Boeken: Straatfotobijbel (Photofacts Publishing), The Observer (Uitgeverij KOMMA), De Wet van de Straat (met mr. Charlotte Meindersma). Columns voor Photofacts, voorheen voor Focus Magazine. Expert Perfecte Plaatje 2025. Lezingen voor CameraNu en fotoclubs. Podcast 30…
View Michiel Heijmans’s profile