
Setting up your camera for street photography
Someone walks through your frame while you're still looking at a number on your screen. Setting up your camera for street photography starts with a few choices you can make ahead of time.
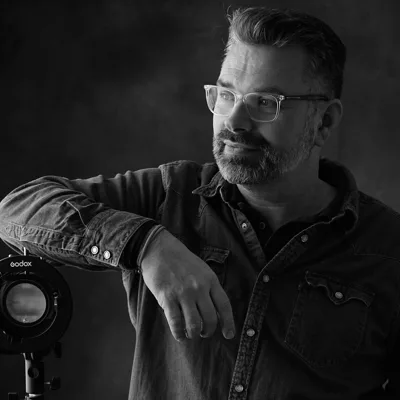
Michiel Heijmans, one of the editors
Updated on October 13, 2026
A useful starting point
You can spend quite a while fiddling with a camera without taking a photo. Open the menu, find a setting, go back a screen. Meanwhile, plenty is happening out there.
My approach starts with something simple: am I walking or standing still? I adjust my settings accordingly. That gives me a useful starting point without having to rethink everything for every photo.
That's how I like to work. You can try it and see if it suits you. There are plenty of other ways to take a street photo.
When I'm walking: 1/500 of a second
When I'm walking, I set my camera to shutter priority with a shutter speed of 1/500 of a second. I choose the exposure time, and the camera selects an aperture to match.
That fast shutter speed helps capture movement sharply. For people walking, 1/250 of a second or faster is a common guideline. When I'm walking, I start at 1/500.
Just to be clear: 1/500 is shorter than 1/250. The number gets bigger, the fraction of a second gets smaller. Very helpful when you're just starting out.
Take a few photos and look at how they capture movement. A setting only starts to mean something when you see what it does to your photo.
When I'm standing still: f/4.5
When I'm standing still, I switch to aperture priority and choose f/4.5. Now I set the aperture and let the camera handle the shutter speed.
The aperture affects how much light comes in and how much is in focus in front of and behind your focus point. You don't need to memorize a string of numbers yet. Try starting at f/4.5 and look at what's in focus in your photo.
In aperture priority, keep an eye on the shutter speed your camera chooses. Just because I'm standing still doesn't mean everyone in front of me is. For people walking, 1/250 of a second or faster is still a useful starting point.
Auto ISO: set your own limit
You can use Auto ISO with either approach. The camera then adjusts the ISO to suit the available light, within the limits you set.
Set a maximum, too. Take a few test shots at different ISO settings and see how much noise you find acceptable. Choose your upper limit based on those photos.
I'm not giving you a fixed ISO limit here. That would make for an easy read, but a limit you've tested yourself is more useful than a number you've simply copied.
On darker days, you'll reach that limit sooner. You could allow a higher ISO, for example, and accept a little more noise. A slower shutter speed is another option if your subject is standing still. See what happens and adjust.
I use autofocus
With a modern camera, you can trust autofocus. I use it myself. Manual focusing isn't an entrance exam for street photography.
Practice a little beforehand: focus on something in front of you, take a photo, and check whether the focus is where you intended. Make sure you can use autofocus without having to open the menu every time.
Zone focusing is a good alternative. You manually focus at a fixed distance and work within a zone of acceptable sharpness. It's not how I work myself, but the next article gives that technique plenty of attention.
A silent shutter can help
I don't use the silent electronic shutter myself. I like hearing that my camera has taken a photo. I appreciate that feedback. Besides, the shutter sound gets absorbed by the surroundings in a city.
If you do want to shoot silently, the electronic shutter is a good option. Look up how to turn it on beforehand and try it out.
One focal length to start with
My favorite is 40mm, or 35mm. Our eyes see roughly like a 42mm lens, so those focal lengths come close.
For architecture in my street photos, I like 50mm because it produces less distortion. At busy markets, 28mm works well: you're closer to the scene, with more in focus at close range.
You don't have to bring them all. One fixed focal length keeps things simpler. If you use a zoom lens, you can choose one focal length for a walk and stick with it.
Try these settings on a walk. Look through your photos afterward and choose one setting you'd like to understand better. You don't have to turn the entire menu into a personal project right away.
Questions about Setting up your camera for street photography
What shutter speed should I use for street photography?
When I'm walking, I use shutter priority at 1/500 of a second. For people walking, 1/250 of a second or faster is a common guideline. Look at your photos to see whether the movement is captured the way you intended.
Do I have to set everything manually?
No. When I'm walking, I choose the shutter speed myself. When I'm standing still, I use aperture priority at f/4.5 and let the camera handle the shutter speed. With Auto ISO, you can also let it handle the ISO, up to a maximum you set yourself.
Do I need to master zone focusing before I start shooting on the street?
No. I use autofocus myself, and with a modern camera, you can trust it. If you'd also like to learn how to set a zone of acceptable sharpness in advance, continue to the next article in the beginner's series: Zone focusing.
5 essential street photography tips
Sign up for Michiel’s newsletter and get his free e-book with practical tips and favorite street photos. First, confirm your email address using the link in the email.
About Michiel Heijmans
Portret- en straatfotograaf. Boeken: Straatfotobijbel (Photofacts Publishing), The Observer (Uitgeverij KOMMA), De Wet van de Straat (met mr. Charlotte Meindersma). Columns voor Photofacts, voorheen voor Focus Magazine. Expert Perfecte Plaatje 2025. Lezingen voor CameraNu en fotoclubs. Podcast 30…
View Michiel Heijmans’s profile