
Your first hour on the street
You're outside, your camera is set up, and suddenly every passerby seems to know you're still figuring out what you're doing. Where do you start?
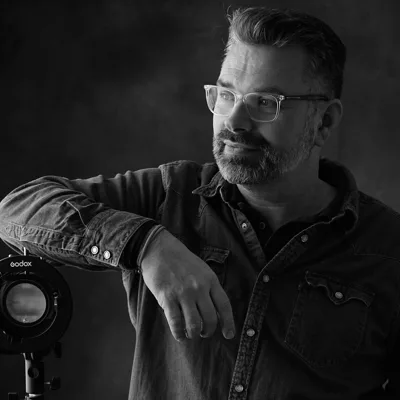
Michiel Heijmans, one of the editors
Updated on October 13, 2026
Just pick a spot
A street corner. A square in your village. A shopping street you already visit regularly. For your first hour on the street, I'd choose somewhere you know a little. At least you won't also have to figure out where you are.
It doesn't have to be a special location. Street photography is about everyday life in public spaces. You don't need to go to a big city for that. A row of bikes, someone carrying groceries, or a shadow on a wall can be enough to catch your interest.
Choose something that makes you curious and stay there for a bit. That saves you an hour of walking around thinking the photos are probably two streets over.
Don't turn that hour into a test
In the previous articles, you've read about street photography, your settings, and zone focusing. Now you can find out how that works for you outside. You don't have to apply everything at once.
An hour is a manageable amount of time to set aside for yourself. You could spend the first ten minutes looking around, take photos for a while, and walk back past the same spot at the end. Think of it as a suggestion. A stopwatch seems a bit much to me.
Don't set yourself a minimum number of photos, either. That just gives you something to count. I'd rather spend a little longer watching one situation than check off ten subjects because the hour is almost up.
You can choose one small assignment beforehand: paying attention to shadows, for example. Or seeing what happens when someone walks through a particular part of your frame. That gives you something specific to look for.
Watch what happens first
Say you see a light-colored wall with a dark shadow across it. People are walking past. Before taking a photo, you can watch where they're coming from and at what point they stand out from the background.
What catches your attention there? The shape of that shadow? The contrast between a light-colored coat and the wall? Maybe the empty space turns out to be the interesting part.
Check the edges of the photo you're about to take, too. Is there something you hadn't noticed? Half a trash can can make quite an impression for something you had no intention of photographing.
Then try taking a photo. Keep watching for a bit and perhaps try a different position. A step to the side changes the relationship between what's close to you and what's farther away. Compare the results.
You don't have to plan every photo in advance. This exercise mainly gives you a chance to notice what you respond to.
Keep the technical side manageable
For this first hour, choose settings you're comfortable using. Aperture priority with Auto ISO is an option, as is manual mode with Auto ISO. If you've just practiced zone focusing, you can keep working with that.
For people walking, 1/250 second or faster is a common guideline. For fast movement, you could try 1/500 second. Check a photo at the beginning to see whether your settings suit what you want to capture.
Then you can turn your attention back to the street. You don't need to compare different focusing methods during this hour. That can wait for another time.
If you're working with a single focal length, feel free to stick with it. For this exercise, it helps if you don't also have to choose a lens for every situation.
If you're nervous
Maybe you see a photo and hesitate. You look again, think for too long, and the moment is gone. It happens. You don't have to spend the rest of the hour arguing with yourself about it.
Make the next attempt a little easier. Choose a wider view so you don't have to stand close to someone right away. Or focus your practice on shadows and objects. A street photo doesn't have to include people.
You can also stay in the same spot a little longer. Watch everyday life carry on around you and look for something that catches your attention. The point of the exercise is to start looking and taking photos in a way that feels manageable to you.
If someone asks what you're photographing, you can simply explain that you're practicing street photography and tell them what caught your eye. There's no need for a complicated story.
And if you've had enough after half an hour, you can finish up. That hour was a commitment to yourself. There's no exam committee involved.
Take another look at home
Look through your photos afterward. Try starting with the photo your eye keeps returning to, even if you don't yet know why.
Try to put into words what you saw when you pressed the shutter. Then see whether it comes through in the photo. Maybe a gesture caught your attention, but it gets lost among everything else in the photo. Maybe an empty sidewalk turns out to be more interesting than you thought when you were there.
Compare photos of the same situation. What changes when someone walks a little farther? Where is that person in relation to the background? Which version do you most enjoy looking at?
Write down one thing you'd like to try on your next walk. For example: waiting longer for an uncluttered background. That gives you a starting point for next time.
Share a photo
On straatfotografie.nl, members share their photos and comment on each other's work. You can share a photo from this first hour there, too.
Add a short note about what you were trying to do. You could ask a specific question: “The shadow was what caught my eye. Does it stand out to you, too?” That gives others something concrete to respond to.
You don't have to wait until you have a photo you feel completely sure about. The difference between what you see in it and what someone else notices can be interesting in itself.
Keep going at your own pace
This was the last article in the beginner's series. You can head outside again now, perhaps to that very same street corner. See what catches your eye this time.
If you'd like to keep practicing a more deliberate approach to photography over the coming months, Streetsessions is one option. My online email course lasts six months, and you follow it at your own pace, with no scheduled sessions or group. Just keep looking, with an occasional email from me.
Questions about Your first hour on the street
Do I need to go to a busy city for my first hour?
No. You can start in your village or your own neighborhood, too. Choose a spot where something catches your attention and you can take your time looking.
What if I barely take any photos?
Think back to what did catch your eye. Choose one thing to explore further next time. You don't need a set number of photos for this exercise.
Which photo can I share on straatfotografie.nl?
Choose a photo you'd like to say something about or ask a question about. Add a note about what you saw and what you were trying to do. That gives other members something specific to consider when they look at it.
Beginner's path
Step 4 of 4
Log in to keep track of what you’ve read.
5 essential street photography tips
Sign up for Michiel’s newsletter and get his free e-book with practical tips and favorite street photos. First, confirm your email address using the link in the email.
About Michiel Heijmans
Portret- en straatfotograaf. Boeken: Straatfotobijbel (Photofacts Publishing), The Observer (Uitgeverij KOMMA), De Wet van de Straat (met mr. Charlotte Meindersma). Columns voor Photofacts, voorheen voor Focus Magazine. Expert Perfecte Plaatje 2025. Lezingen voor CameraNu en fotoclubs. Podcast 30…
View Michiel Heijmans’s profile