
Street photography in Antwerp: watching the rhythm of the city
You're standing on the Meir, and the people just keep coming. Plenty to photograph, you'd think, but where do you start when something is happening everywhere at once?
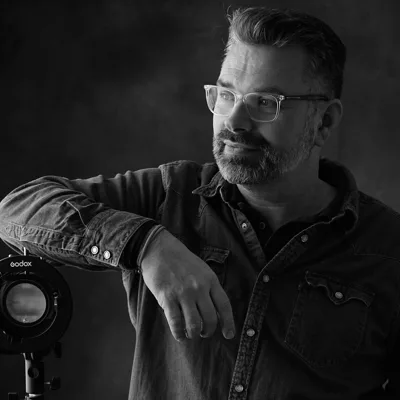
Michiel Heijmans, one of the editors
Updated on October 13, 2026
Start by watching what happens
Antwerp is constantly moving. The port, the fashion world, the diamond industry, and the youth scene give the city an energy you can see on the street. The architecture shifts between rough and elegant. Industrial docks and grand avenues are both part of the city.
You don't need to cover all of that in a single street photography walk in Antwerp. Instead, choose an area where you'd like to spend some time looking. The Meir calls for a different approach than Het Zuid. Around Central Station, travelers from all over the world briefly share the same space.
That difference gives you a starting point. Do you want lots of people in one photo, or would you rather give someone room within their surroundings? Your answer determines where you start and how much activity you look for.
The page on street photography in Belgium covers Antwerp alongside other Belgian cities. Here, we'll stay with Antwerp, particularly how you can work with what you find there while photographing.
You don't have to keep moving on the Meir
The Meir is full of people. You can move with the crowd, but try choosing a spot and staying there, too. The scene in front of you changes while your position stays the same.
Start with the background. Look at how much of it you want in the photo and what's happening at the edges. Then wait to see how people move through that frame. Maybe you're looking for one person who briefly separates from the rest. Maybe you want the crowd to fill the entire photo.
Give a spot like this a few minutes. The first person who walks past tells you very little about how the crowd moves. Watching longer helps you anticipate where people will overlap and where space will open up.
A busy street doesn't automatically make a good photo. It does make it easy to get a lot into the frame. That difference sometimes becomes rather obvious on a larger screen at home.
So don't change everything at once when a photo isn't working. Take a step to the side or frame the scene a little more tightly. That lets you see what a single adjustment does.
The pace changes around Central Station
Travelers from all over the world come together around Central Station. They share one place, sometimes for just a minute. Arrivals and departures help set the rhythm.
Look at the relationship between people who are moving and people who are standing still. You can wait until both appear in the same photo. Or watch how people move through the area before choosing where to stand.
On the Meir, you can work with the flow of people. Around the station, you can watch for changes in that flow. Keep looking for a while when a busy moment seems to have passed. What does the same place look like with fewer people? Does your chosen background still work?
These are practical questions for exploring a camera position. You don't need to know in advance which moment will give you the photo.
Don't try to follow every traveler, either. Choose a part of the scene you can keep track of. That gives you time to react when something happens within your frame.
You can start differently in Het Zuid
Het Zuid feels airy and artistic. That gives you a different starting point than the crowds on the Meir. Here, for example, you can begin with the surroundings, then see what role a passerby plays within them.
Pay attention to how much space you give someone. A wider frame gives the architecture a more prominent role. If someone takes up more of the photo, the attention shifts to that person. Try both from roughly the same spot and see what changes.
You don't need to find a photo that sums up all of Het Zuid. A small part of the surroundings can be enough. A walk quickly becomes hard to manage if every photo also has to explain an entire neighborhood.
Choose between busy and quieter areas based on what you want to practice. If you want people to appear separate from one another, look for space in your frame. If you want to work with overlap, seek out the crowds. Both choices require watching and waiting.
Give your walk a guiding word
Antwerp has pace and style. Those are two possible starting points for a walk. Choose 'pace' as your guiding word, for example, and see what it gives you to photograph.
That doesn't have to mean people in a hurry. You can also look for a difference in pace within one photo. Suppose someone is standing still while others keep walking. What happens around that person gives their stillness meaning.
With 'space' as your guiding word, you'll look differently. How much distance is there between people? Where does part of your photo remain empty? When does that help, and when does it just look like something is missing?
A guiding word is a filter. It helps you decide where to stop and which situation to explore further. You don't need to apply it so strictly that you walk past an interesting photo because it doesn't meet the theme's paperwork requirements.
Afterward, look at which photos belong together. Maybe your version of 'pace' turns out to consist mostly of moments when people are waiting. That could be a reason to explore further on your next walk. You don't have to work out the whole theme while you're out.
Keep your first walk manageable
Choose one of these areas for your first hour. That keeps you from spending most of your time on the way to the next spot. The Meir, Central Station, and Het Zuid don't all have to go on a checklist.
First, take a little time to look without rushing. Then choose a background or a situation and work with it for a while. Move to another spot when you want to explore something different. The approach in your first hour on the street helps keep a walk like this focused and manageable.
Choose workable settings in advance, too. For people walking, you can use 1/500 of a second as a starting point. That leaves you with less need to think about shutter speed while you're looking.
Light and weather may give you a reason to adjust your plan. In harsh light, for example, you can explore how people move through the bright and dark parts of your frame. Stay in the same position for a while and compare the photos.
At home, don't just decide which photo you like best. Compare a few consecutive attempts from the same spot, too. Where does someone blend into the background? Where does space open up? That gives you a specific exercise for next time.
Publishing photos in Belgium
In Belgium, this is called the right to one's image. As a general rule, you need permission to publish a photo in which someone is recognizable. Keep that in mind when selecting photos to share after your walk.
There are exceptions: someone who appears incidentally and as a secondary element in a photo of a public place or crowd, and public figures during their public activities.
So a busy street alone doesn't fully answer the question of whether you can publish a photo. The role a recognizable person plays in the photo makes a difference.
This is general information, not legal advice. The explanation of taking and publishing photos in the Netherlands and Belgium explores that question further.
Practicing together in Antwerp
Michiel Heijmans's conceptual street photography workshop takes place in Antwerp, among other locations. You work with a guiding word or theme as a filter for what you photograph along the way.
The workshop runs from 10:30 a.m. to 2:00 p.m. and has a maximum of five participants. You'll walk about 2 to 3 kilometers. The book Straatfotobijbel is included. Current dates are listed in the schedule on the Antwerp workshop page.
For workshops, exhibitions, and events, you can also check Events on Straatfotografie.nl. You can filter the list for Belgium.
If you're heading out on your own, choose one question to explore beforehand. What happens, for example, if you stay longer in a busy spot? You don't need to have an answer before you leave home. Choosing a position and watching what changes is enough to get started.
link.artikel_kop
Questions about Street photography in Antwerp: watching the rhythm of the city
Where can you start with street photography in Antwerp?
On the Meir, you can practice working with the flow of people. Around Central Station, you can work with the rhythm of arrivals and departures. Het Zuid feels airy and artistic and gives you a different starting point. Choose one area for your first walk so you have time to look.
How do you photograph a busy place like the Meir?
Choose a background and let people move through your frame. Stay in one spot for a few minutes to see where overlap and space appear. Then adjust your position or framing if that helps you get the photo you're looking for.
Can you publish street photos taken in Antwerp in which people are recognizable?
In Belgium, you generally need permission. Exceptions include someone who appears incidentally and as a secondary element in a photo of a public place or crowd, and public figures during their public activities. This is general information, not legal advice.
5 essential street photography tips
Sign up for Michiel’s newsletter and get his free e-book with practical tips and favorite street photos. First, confirm your email address using the link in the email.
About Michiel Heijmans
Portret- en straatfotograaf. Boeken: Straatfotobijbel (Photofacts Publishing), The Observer (Uitgeverij KOMMA), De Wet van de Straat (met mr. Charlotte Meindersma). Columns voor Photofacts, voorheen voor Focus Magazine. Expert Perfecte Plaatje 2025. Lezingen voor CameraNu en fotoclubs. Podcast 30…
View Michiel Heijmans’s profile